
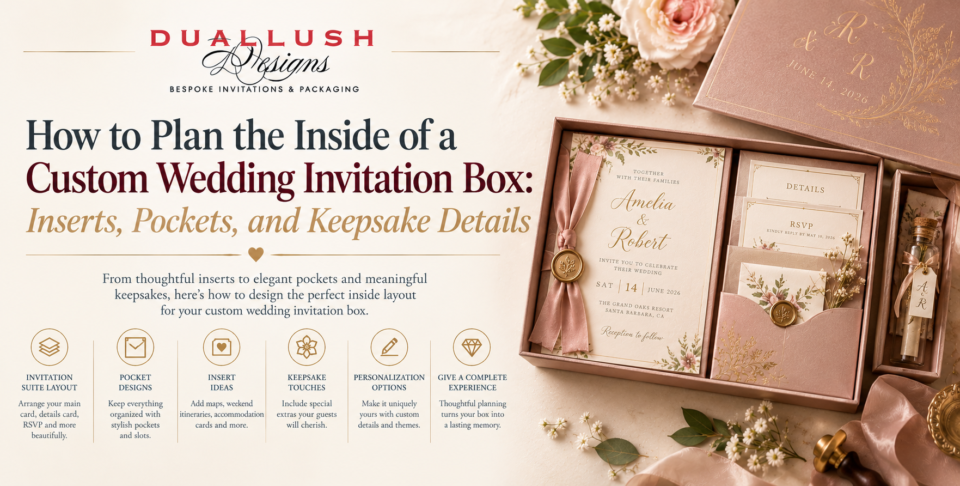
Most couples spend weeks choosing the outside of their invitation box: the material, the colour, the foil on the lid. The inside usually gets decided in a rush at the end. That’s backwards. The moment a guest lifts the lid is the real reveal what they see first, how the pieces are arranged, and what they can take out and keep all shape how the whole suite is remembered.
Here’s how to plan the interior of a custom invitation box deliberately, from the essential inserts to the keepsake details that turn a box into something guests hold onto.
Start With What Guests Actually Need
Before deciding on anything decorative, list the information your guests need to act on. A boxed suite doesn’t change the fundamentals. The pieces that earn a place inside are the main invitation, an RSVP card with a way to reply, and a details card covering the practical logistics: venue addresses, timing, accommodation, transportation, and your wedding website.
Everything beyond that is optional and should be included only if it genuinely helps. If your wedding website carries all of your logistics, a simple QR code card can replace a full details card. If you’re hosting a multi-day celebration, an itinerary card may be worth the extra space. The box is generous, but the principle holds: every piece inside should have a job.
Think in Layers, Not a Stack
A flat envelope forces everything into a single pile. A box lets you design a sequence. The most memorable interiors are planned as layers, with one moment of discovery after another:
- The first sight. What does the guest see the instant the lid lifts? A ribbon, a wax seal, a layer of tissue, or the invitation itself. This is the single most important design decision inside the box.
- The invitation. Usually the centerpiece, positioned so it’s immediately readable without hunting for it.
- The supporting pieces. Details and RSVP cards that sit beneath or beside the invitation, so they’re easy to find but don’t compete with it.
- The final surprise. Something small tucked at the bottom or in a hidden compartment, such as a note, a keepsake, or a lining pattern that only appears once everything is removed.
Planning the order of discovery in advance keeps the interior feeling intentional rather than crowded.
How Pockets and Holders Keep Everything in Place
Loose cards shifting around inside a box undermine the whole effect, especially after a trip through the mail. A few common ways to keep everything secure and presentable:
- A fitted tray or insert holds each piece in a defined spot, so the layout stays exactly as designed.
- An invitation pocket or sleeve gathers the cards into a single unit that slides in and out of the box, which also makes assembly more consistent across a larger guest count.
- A folio nested inside the box adds another layer of fabric and structure, holding the main invitation and RSVP materials in a book-like presentation.
- A ribbon, tassel, or belly band wrapped around the stack keeps pieces bound together and adds one more tactile moment when the guest unties it.
The right choice depends on how many pieces you’re including and how dramatic you want the unboxing to feel. Fewer pieces suit a simple tray, while a larger suite usually benefits from a pocket or folio to keep things orderly.
Choose Interior Materials That Work With the Exterior
The inside doesn’t need to match the outside exactly, but it should feel related. A few pairings that tend to work well:
- A velvet exterior with a lighter, smoother lining lets the plush outer surface stand out against a calmer interior, so the box doesn’t feel heavy throughout.
- A rigid acrylic invitation nested inside a fabric box gives guests a sleek, modern reveal beneath a softer exterior.
- Tonal layering, using different shades of one color across the lining, pocket, and ribbon, creates depth without introducing a second palette.
Whatever you choose, the interior should photograph well too. Many guests will share the unboxing, and the inside is the part that actually appears in the photo.
Keepsake Details That Make the Box Worth Keeping
The strongest boxed suites give guests a reason to hold on to the box itself, long after the wedding. A few ideas, kept deliberately small so the box doesn’t feel overloaded:
- A personal note card from the couple, which turns the box into a personal gesture rather than just a stationery package.
- A monogram or wax seal that guests can keep, display, or reuse on their own correspondence.
- A pressed flower or botanical detail tied to the wedding’s floral palette.
- A small keepsake object connected to the wedding theme, such as a charm, a sachet, or a miniature favor.
- A reusable interior, designed so the box can be repurposed afterward for jewelry, photographs, or small mementos.
The test for any keepsake is simple: would a guest be glad to keep it, or would it become clutter? A few well-chosen pieces beat many forgettable ones.
Plan for Fit, Weight, and Mailing
A beautiful interior only works if it survives the journey. Before you finalize your layout, check three practical points:
- Fit. Every piece should sit snugly in the space designed for it, with no excess room for shifting and no tight squeeze that bends corners.
- Weight. Each added insert, keepsake, and layer increases postage, so confirm the full weight of a finished box before buying stamps for the whole batch.
- Assembly time. Complex interiors take longer to put together by hand, so decide early whether you’ll assemble them yourself or have your stationer do it, and build that into your timeline.
Ordering a sample lets you test the physical layout, the way the pieces fit, and the unboxing sequence before you commit to a full run.
A Simple Planning Checklist
- List every piece guests need and cut anything that doesn’t have a clear job
- Decide the first thing a guest sees when the lid opens
- Choose how pieces will be held in place: tray, pocket, folio, ribbon, or a combination
- Pick interior materials that relate to the exterior
- Select one or two keepsake details, not five
- Confirm total weight, fit, and assembly plan before ordering
The Bottom Line
The outside of an invitation box earns attention, but the inside earns the memory. Treat the interior as a sequence of moments rather than a container for cards, and every piece, from the first glimpse to the last keepsake, will feel considered rather than added on.
Want help designing the inside of your invitation box?
Get a free design consultation with our team, and we’ll help you choose the layout, inserts, and keepsake details that make your suite feel complete from the moment the lid lifts.